23 November 2011

Advent Angels for the first anniversary of Decorattic blog

Is it possible? Advent? Already... ?
And if it is the beginning of Advent, there is also an anniversary of Decorattic blog! For this special occassion I have something different than decoupage :). I hope you like my clay angels. Although I'm not going to give up my decoupage passion, the affair with sculpting was too tempting to resist it :).
All Angels will be on sale on Ebay very soon, as well as other items made here, in my little Decorattic studio.
Thank you all for being with me, following my blog, all your comments and e-mails.
Warm regards from Dorset!


31 October 2011

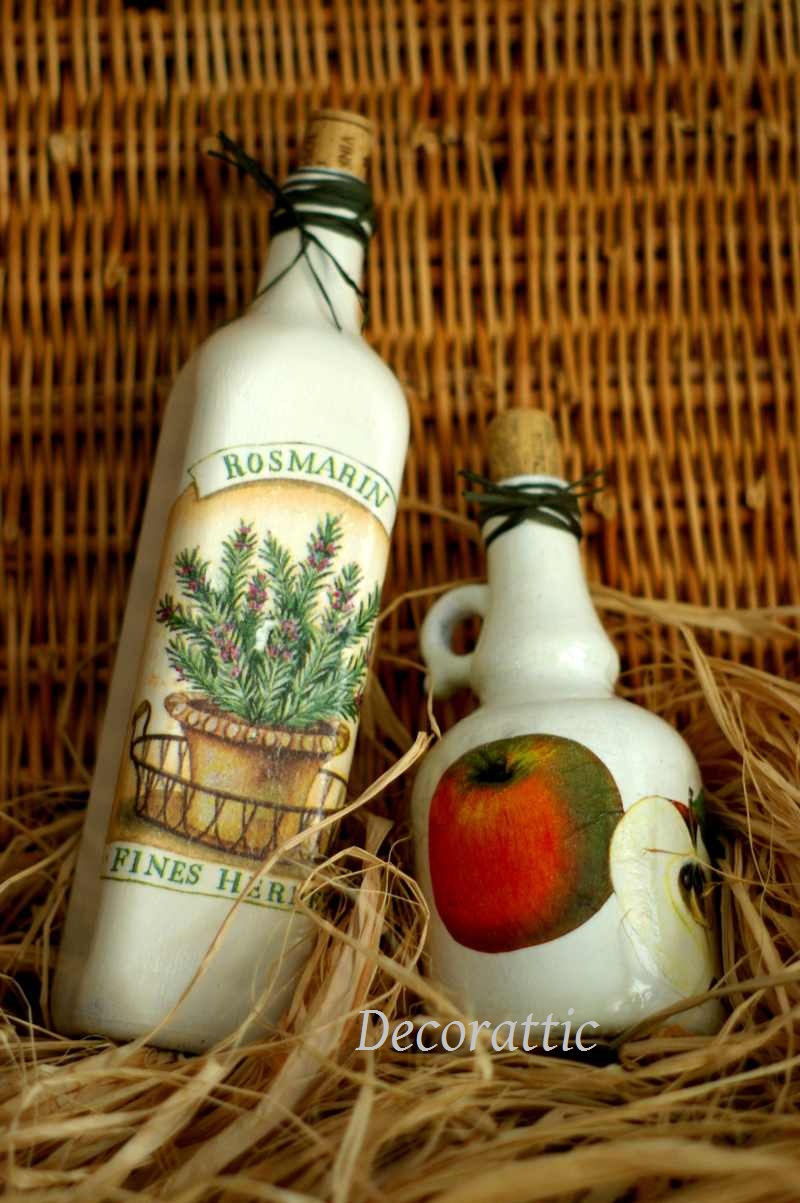
Decoupage on glass

There is a game I really like. It's called Word Associations... Shall we have a go?
Well, it's autumn... So, autumn - harvest - trees - apples - cider - bottle - glass - decoupage :)
When we finished that delicious cider, I had no doubt the bottle was too pretty to throw it away.
And when spread all my paints and materials on the table, I've notice another bottle standing on the cupboard. It wasn't even empty, but its shape was so nice and I decorated it as well. After puting two coats of varnish, I've done a top up with olive oil and put it back on the shelf.
The cider bottle has been still waiting for the right usage idea.
It is a good fun with decu on the glass. How many pretty bottles or jars are in your kitchen?
You can easly turn them into something unique. Enjoy your autumn associations then :)

Before:

After:

18 September 2011

Retro tea box

I have to say I cannot resist that special "retro" charm of old wooden boxes. But flea markets are not the only way to get them. There is so much more fun if you create your own and decorate it with your favourite motif, lettering or whatever you want. You can also add a hint of shabby chic to make it look even more retro :)


RETRO TEA BOX - MY TUTORIAL

MATERIALS:
- wooden box
- decoupage paper or tissue napkins
- decoupage glue
- acrylic paints
- water based varnish
- dye for wood (or just acrylic paint)
- sand paper fine
- a candle

INSTRUCTION:
1. Sand the box and remove dust carefully
2. Paint the main part of the box with dye. Remeber to protect the surface you work on as dye stains everything around. One coat should be enough. Let it dry for about half an hour.
3. Paint the lid with white acrylic paint. Let dry.
4. Paint edges of the lid in brown and when dry apply a bit of wax from the candle.
5. Apply another coat of white paint and let dry again.
6. Glue your motif and let dry.
7. Rub the edges in a few places with sanding paper to achieve some shabby-chic effect. Don't do it in too many places.
5. Paint some background that goes with your theme or add some shading to create depth of your picture. Let dry.
6. Apply several coats of varnish.
TIP: To achieve some antique effect add a drop of brown paint to the varnish.

11 August 2011

Stop the clock with decoupage :)

Clocks are on the top of my favourite decoupage items list. The surface is usually flat so it's easy to work on it. Also, there is actually nothing to limit you in choosing style or motifs: you need clocks everywhere: in the kitchen, bedroom or children's room.
Your friends need them too :) So hand-decorated clock would be a great gift idea!
There are some clocks I've made recently. I used decoupage paper and printed tissue napkins.
Time flies - but with decoupage you can stop it for a moment :)


17 July 2011

Decoupaged furniture - a trunk again...

I decorated it thinking of my future living room and its light whites... Well, it seems I'll need to make another piece as I sold this one on the craft show.
But at the moment I think I need some break from my trunks, so this one is going to be the last... For now of course :)